Fine Tuning – STEAM Lesson Inspired by Nathalie Miebach

Standard

So last year, I was lucky enough to attend the MAEA conference in Boston, where Nathalie Miebach was the keynote speaker.  I learned about her work a bit earlier in the year while taking a Contemporary Art class with Lois Hetland at the EDCO Collaborative in Bedford, MA.

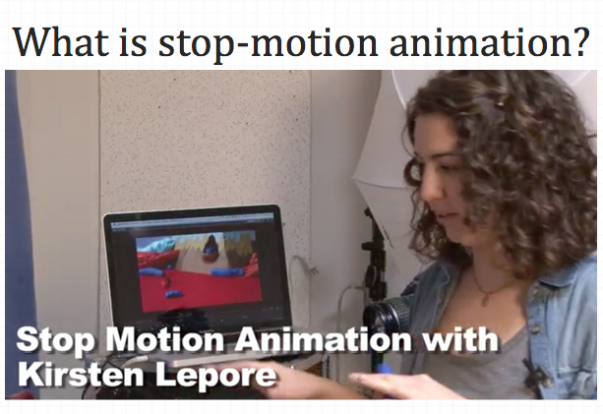
After the keynote, it was obvious I needed to develop a unit inspired by the woven sculptures she creates using a variety of scientific data.  If you are not familiar with her work, I suggest you check out her Ted Talk! I actually use this video in my introduction to this unit with my fourth graders.

So, this unit has required lots of trouble-shooting along the way….I don’t think it’s quite ready to be shared out, as I still need to fine tune how I manage my students data collection, but I think I’m getting there.  I’ll be teaching it again soon when my next group of fourth graders come to extra art at the end of this month, so I’m thinking some time in January I will be able to share the steps, tips, and finished photographs!

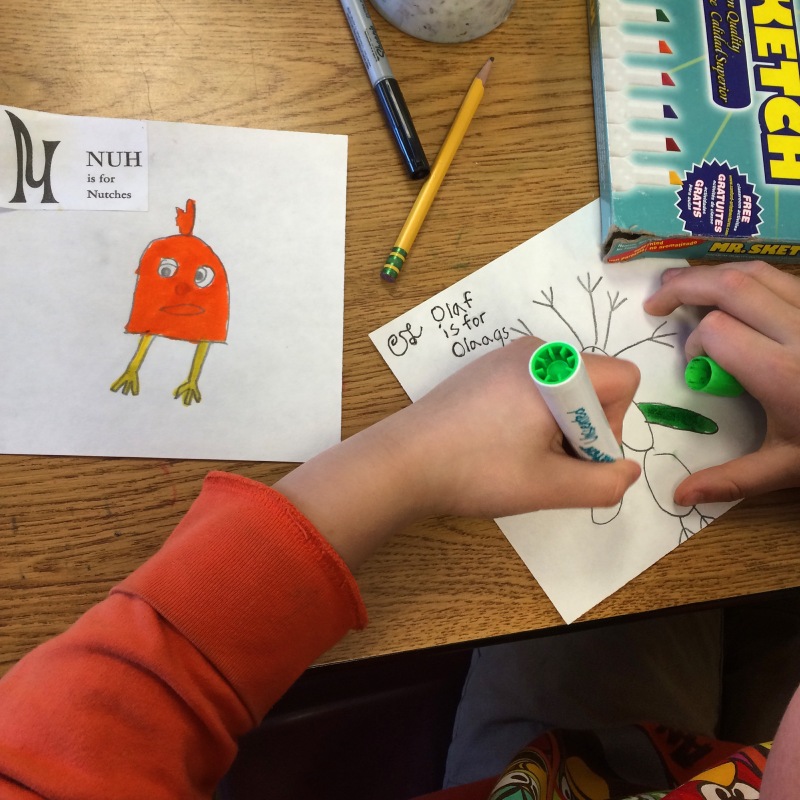
For now, check out how hard my students have been working by viewing the in-process photographs below. They are using weather data stored on our class iPads, and weaving their pouch based on the color they’ve assigned for a particular data range (typically temperature related).

Conferences & Presentations Galore! – MassCUE & MAEA2015

Standard

I guess I was really into submitting proposals last winter/spring, because I ended up having two conferences to present at this fall – MassCUE at Gillette Stadium, and MAEA2015 in North Adams, MA.

At MassCue I presented about all the ways I am integrating technology into my elementary art classroom, using the SAMR model of technology integration. You can check out the full Prezi here and access all of my resources (which include links to all of the apps I use, and any digital materials I have to share)

MassCUE_1

Some of the projects and technology I shared:

  • Using Chrome bookmarks to make it possible to access weather data on all of my iPads easily for a weaving
  • Using Chatterpix app to creating talking drawings in connection to a biography portrait unit & self portrait unit
  • Using Explain Everything app to explore artwork in grades 1, 2, and 3 like a mini interactive whiteboard
  • Using iMovie to create interview videos that reflect on art practice
  • Using Explain Everything to create informative videos that share how to do a particular art technique

At the MAEA conference I presented in more detail how I create stop motion animations with my grade 6 students, and as a collaborative project with some of my grade 3 & 4 students. My attendees were even able to do some animating! You can check out the full Prezi here and access all of my resources (which include all of the videos and worksheets I use when teaching stop motion animation)

MAEA2015

When teaching stop motion animation I use two videos from PBS Learning Media, which are linked in the resource document above.  If you haven’t checked out PBS Learning Media they have many really great art video resources, I definitely love this free resource. I also use a collection of tutorial videos and ‘secret recipe sheets’ from Animation Chefs (also linked above).

Check out some of the animations that were made in the short time we had to animate.

National Art Education Association Convention – NOLA Edition

Standard
Screen Shot 2015-03-26 at 1.34.58 AM

Click to Access my Prezi

This year the NAEA convention is in New Orleans, and I am so excited to get a break from the snow we still have in the North East.  If you are here, and are interested in learning how I use my iPads beyond digital drawing, check out my session Got iPads? Going Beyond Digital Drawing – Friday 4:30-5:20pm Convention Center Meeting Room 208 (Second Level). I hope to see you there!

Read Across America – Celebrating Dr. Seuss’ Birthday

Read Across America
Standard

Each year my school participates in Read Across America, a celebration of Dr. Seuss’ Birthday.  When I first started teaching here, the school librarian approached me about doing some activity with the students in art for Read Across America.  She brought me a number of books, and the one that caught my eye was On Beyond Zebra! 

This slideshow requires JavaScript.

I don’t do this lesson with all of my classes, just the ones that fall close to March 2 AND it makes sense to do it.  I don’t like to interrupt my other units too much.

Last year I had the students spend 2 classes on this.  On the second class they finished up and shared their work via AudioBoom.  This year I will be doing this activity with 4 classes, 2 the Friday before RAA and 2 the day of, and it is just a one day activity.  Things have been so choppy with all of the snow days, so we’re just taking 1 class for these.

This project is totally flexible.  I’m thinking about reaching out to classroom teachers for next year and see if they want to collaborate and start this in art and use it as a writing activity back in the classroom.

That way everyone could start it the week before RAA, and in their classroom they would work on it the day of RAA.

I hope you all had a great time if you were able to celebrate Dr. Seuss’ Birthday!

Stop Motion Animation via iPads – MAEA 2014 recap

Standard

I was fortunate enough to be chosen to present at the Massachusetts Art Education Association 2014 conference this year.  It was hosted by Mass Art in Boston, MA on November 8 & 9.

Besides presenting I also helped organize a bit of the event, which included the hospitality bags (I like to call them swag bags) and the door prizes.

For my presentation, I shared what I have learned this past year while teaching my six graders how to create stop motion animation with ipads.  The process has changed a significant amount since last year when I presented on it at the National Art Education Conference in San Diego.d

Here’s a bulleted list of what I learned:

  1. It’s easier to animate things that are laying flat on the table.  Work with gravity, not against it (Check out my prezi to see my current FREE set up)
  2. There are lots of resources online.  I like PBS Learning Media & Animation Chefs. (Check out this Drive folder for all the resources I use.  And check back often, because I continually add to it as I find things)
  3. Give the students plenty of time to play around and understand how many photos are needed for a smooth animation.
  4. Stop Motion Studio Pro is a great all in one app.  You have access to all the basics needed for animation (onion skin & adjusting the FPS being the major 2), as well as sound effects, music, and the ability to record.  Check out the free version to get a taste for the app.

Check out the resource page I shared with participants to get all the details, AND look below to see the awesome videos that were made in my hands-on session!

Zany Zoo – End of the Year Collaborative Mini Unit

Standard

So, like most art teachers, I ended up with 1-2 classes for a number of my sections, and there isn’t very much you can do with that.  Instead of just allowing for a free choice day (which would be mass chaos this time of year), I looked to my pinterest board, and found this pin from the blog Art for Small Hands.

It. Has. Been. A. Life. Saver. and a super popular activity for my first, second, and third graders this time of year.

I took the premise of Julie’s lesson (which has a great outline and many helpful tips for the whole lesson) and mashed it with the Exquisite Corpse game that the Surrealists played, and turned it into a collaborative drawing activity.  Students started their animal with a head and neck, and then moved to the next chair at their table, to add a body to their table-mates drawing. Then they moved to the next chair to add a tail, and then legs.  If there were 5 students at a table I had them break the legs into front and back.  If there were 3 students at a table I had them draw the body and the tail together.  For the younger grades it did take them about 1 round to understand the process, but after that first round, they were able to manage the moving around on their own.

I did a demo drawing to show students how they would take turns creating their animals.  I pretended to be different students at a table, and drew in different colors so they would understand.

I did a demo to show students how they would take turns creating their animals. I pretended to be different students at a table, and drew in different colors so they would understand.

I decided to have them get up and move seats, because I know moving around a bit is better for children who are so hyped up that it’s almost the end of the year (or really for any time of year). You could always just have them trade papers to save a bit of time.

When everyone was back at the paper they started, they traced the pencil line in sharpie and added background details and color.  I also showed my students how to take the names of all of the animals and create a new name by selecting parts of the name.  I think this was the part they liked the best!Zany Zoo 2

Zany Zoo 3To take this one step further during the second class while students were finishing, I had them record a bit about their animal via Audioboo.  I shared this with my sister and boyfriend Thursday night, and we had the best time listening to their cute little voices, and noticing the details they added.  I’m sure the parents at my school will treasure these little recordings for a long time.

If you want to kill some time, here is a link to all of the Zany Zoo drawings that have been posted to Audioboo, OR Below are some of my favorites, but really it was so hard to choose!


Chatterpix, Professional Development Opportunities, Video Resources, OH MY!

Standard

For a number of years, 3rd graders at Conant have completed this collaborative project that connects their work in the classroom and their work in the art room. In class, students choose and learn more about a particular person, through the use of biographies.  They write a report, dress up as their person, and present to their classmates. In art with me they create a portrait drawing of their person, to be displayed with their report.

Not only do they create a lovely drawing to complement their report, they also learn the difference between portrait and self-portrait while relating those two vocabulary words to what they’ve learned about biography and auto-biography. They also learn additional vocabulary words for describing types of portraits (frontal view, profile view, 3/4 view, bust, full-length, and group).

I made a short video that introduces these types of portraits.  Feel free to use it in your class!

This year, I took it a step further, after learning about the Chatterpix app.  When students were finished coloring their self-portraits, they used an iPad to create a talking photo, aka a Chatterpix.

Each classroom teacher had these drawings on display and with them I posted QR codes that linked back to the videos.  This integration of QR codes came from a class I took at Framingham State University.  (Side note, if you need PDP’s or credits to advance your salary scale, check out what Framingham State has to offer.  It’s very very reasonably priced -$179 a credit, AND it’s online.  Super cool, and both classes I’ve taken have been great) I don’t think many people scanned them, but I know the more I include QR codes in my displays, the more familiar everyone will get with them.  There are many websites to make QR codes.  I like qrstuff.com, but also use goo.gl to shorten links and quickly make QR codes.

Initially I hoped the students would be able to make the QR codes themselves using the QR Reader & Scanner app, but I found that with only 6 iPads, that was too slow going for the short amount of time we have in art.  It just took too long to create the chatterpix, export it to the camera roll, upload to dropbox, grab the video link, and use that link to create a QR code.  So instead the students did everything but make the QR code. Perhaps next year when I am a 1:2 iPad classroom this will be possible. (Yes, I’m getting another 6 iPads via a very successful Donors Choose campaign, and some extra money from the Art Department) Certainly in a 1:1 iPad classroom!